
Recent Post
- 2026-08-19 00:30:34
- 2026-08-14 04:31:35
- 2026-07-09 04:31:15



Adjusting belt tension on a CNC router is a routine yet critical maintenance task that directly affects positioning accuracy, surface finish, and the service life of both the transmission components and the spindle. While most modern machining centers—particularly those from established manufacturers like Roctech Machinery Co., Ltd. —utilize rack-and-pinion drives on the X and Y axes, belt-driven spindles and, in some legacy or compact models, belt-coupled ball screws remain common. This guide outlines the correct procedure, the underlying mechanical principles, and the diagnostic indicators that signal when adjustment is necessary.
Why Belt Tension Matters
In a CNC router, belts serve two primary functions: transmitting torque from the servo or stepper motor to the ball screw (or rack pinion), and coupling the spindle motor to the spindle shaft. Incorrect tension introduces compliance into the drive train. A loose belt allows the tool to lag behind the commanded position during rapid direction reversals, producing rounded corners, chatter marks, and dimensional errors that are particularly visible in woodworking and stone engraving. Conversely, an over-tightened belt accelerates bearing wear, increases motor load, and can induce resonant vibration that degrades surface quality.
The mechanical relationship is straightforward: the belt must transmit the motor’s peak torque without slipping, yet remain flexible enough to absorb micro-impulses from cutting forces. For a typical 9kW spindle operating at 24,000 RPM, a polyurethane or rubber timing belt with a steel tension member should deflect approximately 1–2 mm when a moderate thumb pressure is applied midway between the pulleys. This rule-of-thumb, however, must be refined by measuring the static tension with a dedicated gauge or by monitoring motor current draw during a test cut.
Pre-Adjustment Inspection
Before making any adjustments, power down the machine and lock out the main disconnect. Remove any guarding around the belt area. Inspect the belt for:

- Cracks, fraying, or glazing on the tooth flanks – these indicate age or misalignment.
- Uneven tooth wear – a sign of pulley misalignment or a bent shaft.
- Excessive dust or resin buildup – common in woodworking environments; clean thoroughly with a dry cloth or mild solvent.
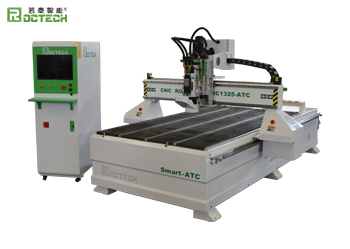
Also, check the pulley set screws and keyways. Loose pulleys are often misdiagnosed as belt problems. On Roctech ATC series machines, the Z-axis ball screw is directly coupled to the servo motor via a rigid coupling, eliminating belt issues on that axis. However, the spindle drive on models with air-cooled spindles (e.g., the RC1325S-ATC) uses a 1:1 belt drive, which is the primary adjustment point.
Step-by-Step Adjustment Procedure
Tools Required:
- 10 mm and 13 mm open-end or box wrenches
- Feeler gauge (optional)
- Belt tension gauge (e.g., Gates Sonic Tension Meter)
- Paint marker or a small file for marking the adjustment plate
Procedure:
1. Access the tensioner. On most gantry-style routers, the motor is mounted on a pivoting plate. Loosen the four bolts securing the motor base plate – do not remove them completely. Typically, two bolts are at the front, two at the rear.
2. Position the motor pivot. The adjustment screw (often a M10 hex head) is located at the rear of the motor plate. Turn it clockwise to increase tension, counterclockwise to decrease. Move the motor in small increments – half a turn at most.
3. Set the deflection. Place a straightedge across the belt span between the spindle pulley and motor pulley. Press down gently with a finger at the center of the span. The deflection should be 1.5 mm for every 100 mm of free span. For example, a span of 200 mm should deflect no more than 3 mm.
4. Check for twist. Rotate the spindle by hand – it should turn smoothly with uniform resistance. If you feel a “cogging” sensation, the belt teeth are skipping due to insufficient tension. If the spindle is difficult to rotate, the belt is too tight.
5. Lock the tensioner. Tighten the four motor plate bolts to the manufacturer’s torque specification (usually 30–40 Nm for M8 bolts). Re-check the deflection after locking, as the plate may shift slightly.
6. Verify alignment. Use a straightedge or a laser alignment tool to confirm that the motor pulley and spindle pulley are coplanar. Misalignment causes premature belt edge wear and generates a characteristic squealing noise.
7. Run a test. Without cutting material, command a rapid traverse (G00) of the spindle
Looking for more information about our CNC machines and services? Contact us today.
ContactNext:Not






















Belt Tension Adjustment on CNC Routers: A Technical Field Guide - Roctech® have advanced technology for CNC Router,cnc router cabinets,Roctech already have 15 years experiences of cnc router technology.-© 2023 Roctech® Machinery Co.,Ltd. - All Rights Reserved Website Terms Of Use ● Privacy Policy ● Cookie Policy